Showing posts with label recipes. Show all posts

Wednesday, February 12, 2014

Sugar Free Mornings

Daniel wakes up early to watch his breakfast bake.

Most Monday mornings start with a new batch of Granola in our home.  Sometimes that batch doesn't last the week and I'm making another to get us through the weekend.  It's safe to say that we're addicted to it-from the oldest to the youngest in the house.  We usually enjoy our Granola with homemade Almond Milk, but it also goes great with yogurt or ice cream. 
I've been stocking Granola in our cabinets for years, but it wasn't until recently that I took the time to write the recipes down.  I like to take a bag of this breakfast treat when I'm taking a meal to someone, and that always comes with a recipe request.  So here you go-my three favorite recipes.  But be warned - it is Addictive!  Did I mention that these recipes contain no sugar? 
 
Chocolate Protein Granola
6 Cups Rolled Oats
2 Cups Flour (I use whole spelt)
½ Cup Almond Meal
½ Cup Finely Shredded Coconut
½ Cup Carob Powder
1 Cup Chopped Pecans
1 teaspoon Cinnamon
1 teaspoon Salt
2 Tablespoons Chia Seeds
 
1 Cup Honey

½ Cup Peanut Butter
½ Cup Oil (I use Safflower)
½ Cup Warm Water
2 teaspoons Vanilla Extract
 
1 Cup Raisins
 
Combine the dry ingredients in a large bowl.  Whisk the wet ingredients in a small bowl.  Combine wet & dry ingredients and pour into a 13x9 or larger dish.  Bake at
250° for 1 hour.  Stir 3-4 times while it cooks.  Add raisins.  Store in an air tight container after it has cooled completely.   
 
Banana Walnut Granola
6 Cups Rolled Oats
2 Cups Flour (I use whole spelt)
½ Cup Flax Meal
½ Cup Finely Shredded Coconut
1 Cup Finely Ground Walnuts
1 teaspoon Nutmeg
1 teaspoon Salt
 
1 Cup Honey
1 Ripe Banana, mashed
½ Cup Oil (I use Safflower)*(you might need a little more, see instructions)
½ Cup Warm Water
2 teaspoons Vanilla Extract
 
Combine the dry ingredients in a large bowl.  Combine the mashed banana and enough oil to measure 1 Cup of total liquid.  Whisk the wet ingredients in a small bowl.  Combine wet & dry ingredients and pour into a 13x9 or larger dish.  Bake at
250° for 1 hour.  Stir 3-4 times while it cooks.  Store in an air tight container after it has cooled completely. 
 
 
Winter Harvest Granola
6 Cups Rolled Oats
2 Cups Flour (I use whole spelt)
½ Cup Almond Meal
½ Cup Pumpkin Seeds
½ Cup Finely Shredded Coconut
1 Cup Sliced Almonds
1 teaspoon Cinnamon
1 teaspoon Salt
 
1 Cup Honey
1 Cup Oil (I use Safflower)
½ Cup Warm Water
2 teaspoons Vanilla Extract
1 teaspoon Almond Extract
 
1 Cup Dried Cranberries
½ Cup White Chocolate Chips
 
Combine the dry ingredients in a large bowl.  Whisk the wet ingredients in a small bowl.  Combine wet & dry ingredients and pour into a 13x9 or larger dish.  Bake at
250° for 1 hour.(I have found it necessary to cook this particular Granola at a higher temperature for the last few minutes because I'm using fresh Almond Meal, which makes the mixture a little wetter.)  Stir 3-4 times while it cooks.  Add Cranberries and White Chocolate Chips (omit the chips to keep it sugar free).  Store in an air tight container after it has cooled completely. 
 

Saturday, March 9, 2013

Pronounceable Bread

I regularly roll up my sleeves to try new recipes and these days I'm experimenting with BREAD. Have you read the growing list of ingredients in your bread? Can you pronounce them all? Me neither...so this has fueled the ambition for my latest attempts at this ancient art form.

My fascination with bread ignited in elementary school when Mrs. Fox started reading the most wonderful series of books aloud to our third grade class by Robin Moore - The Bread Sister of Sinking Creek. I need to read the stories to my children; hopefully I can do the voices as good as my teacher did.

Swiss Braided Bread is my favorite to make.  It is much like making a hand-rolled soft pretzel.  If you're looking for something beautiful at your dinner table this Easter, I recommend you make this.  The recipe comes from 500 Treasured Country Recipes from Martha Storey and Friends. 


Swiss Braided Bread
1 Tablespoon active dry yeast
1 cup warm water
1/3 cup nonfat dry milk
2 Tablespoons sugar
1 teaspoon salt
2 Tablespoons butter
1 egg
3 cups all-purpose flour, plus ½ cup if needed

Glaze
1 egg yolk, beaten and mixed with 1 tablespoon water

1.        In a large bowl, sprinkle the yeast into the water; stir until dissolved.  Add the milk powder, sugar, salt, butter, and egg; mix well to break the butter into small pieces. 
2.       Add 2 cups of the flour and beat the mixture with a wooden spoon until smooth.  Gradually add the remaining 1 cup of flour and continue to stir with the wooden spoon.  Remember, it is easy to add more flour as needed, but it is impossible to remove flour if the dough becomes too stiff. 
3.       Scrap the dough out of the bowl and knead it on a floured surface for 5 to 10 minutes, until smooth and elastic.  Add more flour if the dough becomes unmanageably sticky.
4.       Place the smooth ball of dough into a large, lightly greased bowl.  Cover it with a damp towel and let it rise in a warm spot for 1 hour, or until double in bulk.  Make a fist and punch down the dough.  Divide the dough in two, making one half slightly bigger than the other.  Divide the larger half into six equal pieces.  Roll each piece into a 10 to 12 -inch strand.  Separate into two groups of three strands and make two braids.  Repeat process with the smaller half to make two slightly smaller braids.  Place the smaller braids on top of the larger ones to make two double-decker braided loaves.
5.       Grease a large baking sheet.  Arrange the loaves on the sheet, at least 6 inches apart.  Cover with a towel and let the dough rise for about 1 hour. 
6.       Preheat oven to 400°F.  Brush each loaf with the glaze.  Bake the loaves for 10-15 minutes, or until lightly browned.  Remove from pan immediately and cool on a wire rack.

Yield: 2 large loaves

When cranberries are in season I enjoy making (ok, mostly eating) Cranberry Swirl Loaf by Taste of Home.  It's another great presentation bread that I can't get enough of.  I want to experiment with this bread in the spring when strawberries are in season and we're picking more than we can eat.
 

For the past few years I've been using Spelt flour for most of my baking and cooking.  Spelt is higher in protein, fiber and B vitamins than wheat and it is easier to digest than it's distant cousin wheat.  It is easy to incorporate into recipes.  The only changes that need to be made is to cut out 25% of the liquid from the recipe.  However, when it comes to using Spelt for yeast bread...well let's just say it's a work in progress.  Several attempts have resulted in bread that has brick like qualities.  But just this past week I finally found some recipes at Peachy Palate that seem to be worth my time and effort.  So far I've tried Wholegrain Spelt Sandwich Bread and Cinnamon Raisin Walnut Spelt Bread.  I look forward to trying many more.            


Friday, February 15, 2013

Creating Joy


One of my resolutions for 2013 is to be more intentional about creating joy in the lives of my family.  Schedules, chore lists and hard work all seem to come naturally to me, but slowing down to enjoy life is a struggle.  I typically spend most of the morning hovering over my Homeschool Log to make sure the daily goals are accomplished. Yesterday was different - I kept the pages closed in an effort to teach my children that it's ok to have fun sometimes.  We spent the first part of the morning putting the finishing touches on our Valentine's.  Pinterest has such a wealth of ideas for handmade Valentine Cards.  I found three simple designs for the boys to create during the week and they were quite proud of their heart shaped accomplishments. 
 Then we headed down the road to play in the snow.  That sounded simple right?  Well...we haven't had snow here in a while, so it took quite a bit of effort to locate the snowsuits, matching gloves and get them all on.  It seems my boys have grown quite a bit from last year.  The snow pants were on the short side, but we'll make due for now.  They had such a great time with Esther and Isaac - building a snowman, making snow angels and climbing the glimmering trees. 

My husband and I have reached this place in our marriage where we are just soooo realistic with each other.  So Valentine's Day wasn't all about the two of us, but about the five of us.  We do look forward to attending a couple's banquet this evening and I really anticipate the day that we can have more alone time.  But right now in this season of life we focus on their needs.  They need to feel love, security and approval from us - where would they get it otherwise?

In elementary school I recall making special Valentine Mailboxes to tape to the side of our desks.  They were mere brown paper bags with Dollar Store Doilies, but I just loved having my own little bag overflow with cards from each of my classmates.  In an effort to create the same excitement for my children, yesterday I made heart shaped bags from felt to hang in our kitchen.  I just love working with felt.  It's inexpensive, there's never a wrong side and it doesn't fray.  I simply cut out two large hearts for the front and back, two smaller hearts for front contrast and two long strips for handles.  I purchased pinking shears for the project that really gave it a special touch.  


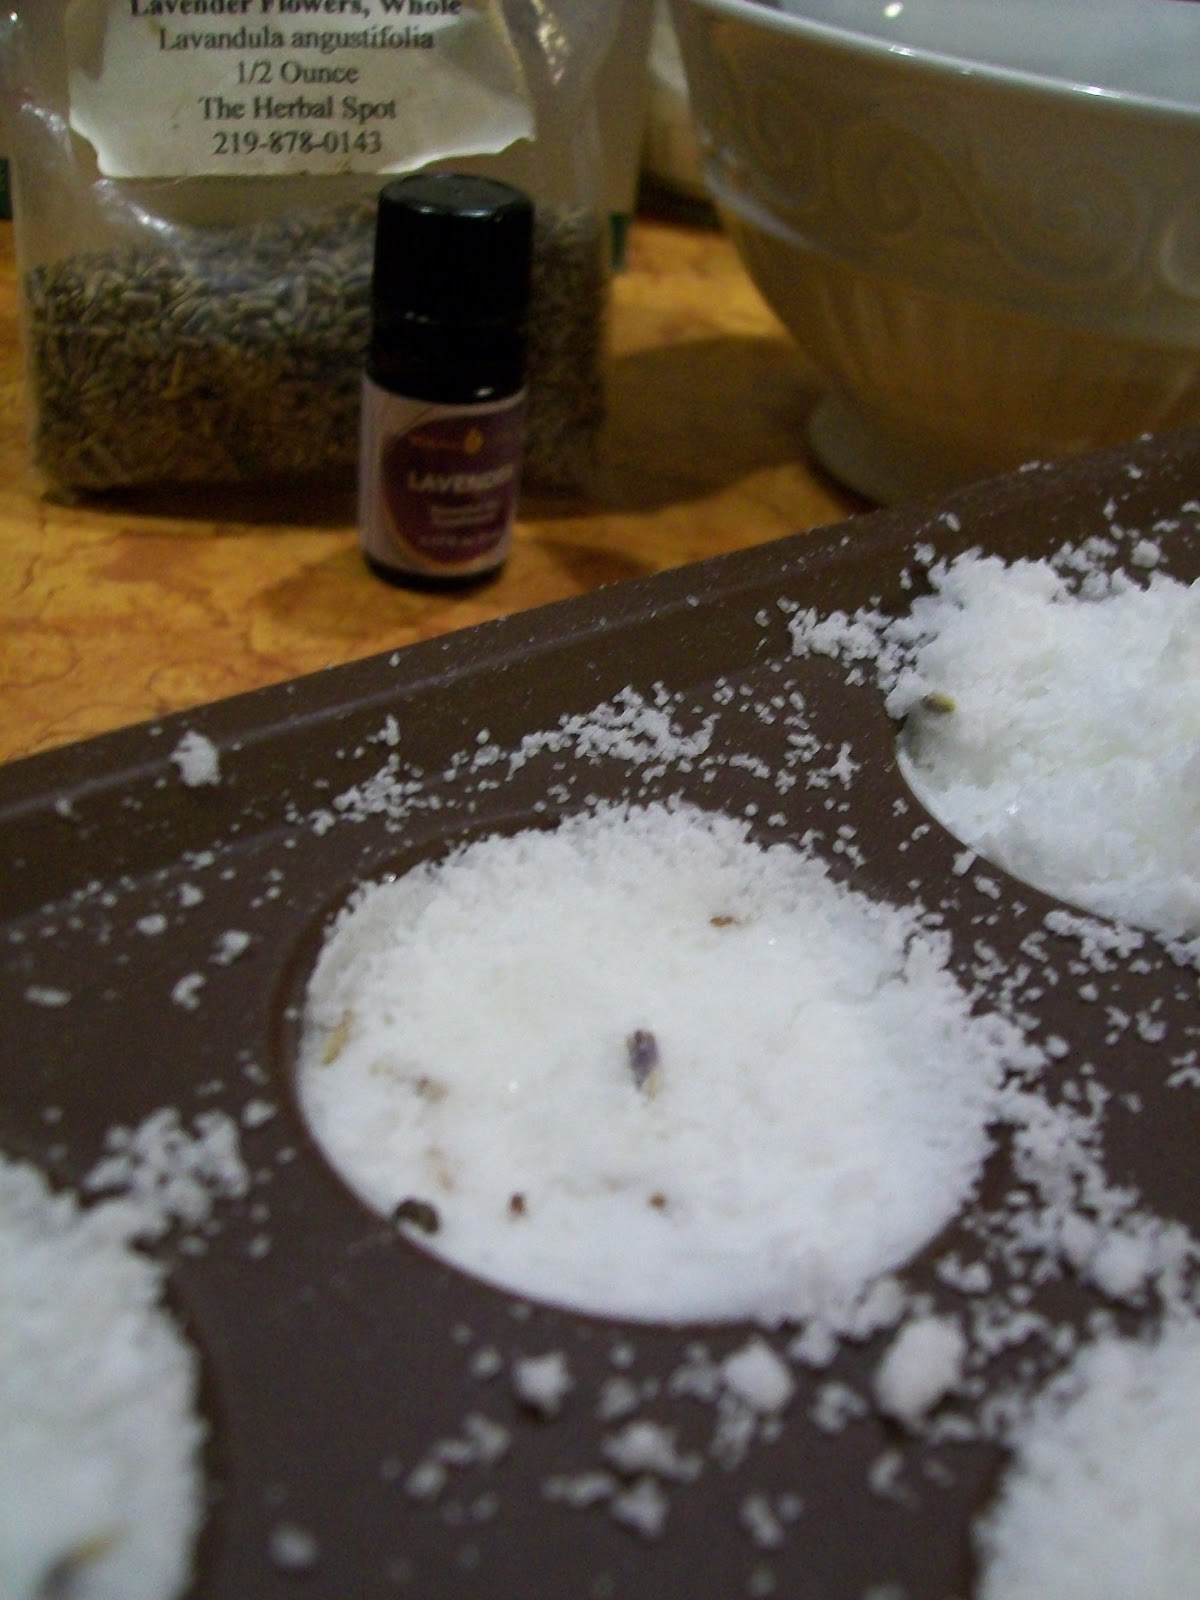
The gifts were simple - Three Hershey Kisses in each bag, some handmade cards and I made Lavender Bath Bombs.  It was my first time to makes bath bombs and to my surprise it was incredibly easy!  I enjoyed a Luxurious Lavender Bath this morning.

Here is the recipe if you want to give it a try:
Ingredients
1 cup baking soda
½ cup citric acid

½ cup Epsom Salts
2 ½ Tablespoons Lavender
       Almond Oil
6 drops of Young Living
      Lavender Essential Oil
½ teaspoon Borax
1 teaspoon dried lavender flowers
Spray Bottle of Witch Hazel


Directions
1.  In a large bowl combine the baking soda, citric acid and salt. (Be sure to break up any clumps.) 
2.  In a small bowl combine the oils, Borax and dried flowers. 
3.  Quickly combine the wet and dry ingredients, spraying the mixture 2 - 3 times with the Witch Hazel to make it a little damp.  Making this mixture too wet  may start some fizzing action or make it expand. 
 4.  Put the mixture into molds of your choice (I used an 8 cavity brownie pop silicone mold by Wilton) and allow to dry for 10 minutes.  Then carefully remove your bath bomb and allow to dry for a few days before storing.  (I put mine in organza bags, so they can continue to dry while packaged.)


And last but not least...we feasted for dinner -  Dark Chocolate Fondue, strawberries, bananas, Auntie Anne's® Apple Cinnamon Pretzels were just a few things on the menu.  Jason lingered at the table long after the rest of us were finished.  He doesn't eat large quantities, the boys just loves the process of eating, savoring every bite.  Happy Valentine's Day!    


Pin It

Friday, September 21, 2012

Summer's End Memories

I sat down several times in the past few months to blog but found it difficult with so much to do and a transverse baby in the womb - sitting has been sooo uncomfortable!  Over Labor Day weekend of all times, and at 32 weeks, that baby finally turned head down and put me into Labor!  After a few days of lingering contractions and much pain, things have finally calmed down and I'm feeling pretty good again.

As much as my boys give me trouble, they really helped me out and we were able to get a lot accomplished this summer. With baby on the way we even started homeschooling early amid all the work and already have 42 days behind us! (Happy Dance). Yes it was a very productive summer, but it seems that we have suffered one loss...our dear cat Figaro has been missing for about a week now. The boys and I pray each morning for his safe return, but in reality, I don't think we'll see him again. We'll keep praying, but it breaks my heart that he is gone.  
Here are some highlights from the past few months.  We took no grand vacations this year, but we were together and saved our money for things like new flooring, a mattress and we're still looking for a new car for my husband.  After the pictures you'll find a recipe that I came up with called Summer's End Stew.  It combines all those things in the garden at the end of summer to form a filling dinner.  Don't judge the taste by the picture - soup doesn't always look elegant. 

The boys decided to help wash
the dishes one morning.  It
really made a mess, but I know
they meant well.
Who doesn't love swimming
with their cousins?


Plum Jam


Golden Relish
Bread & Butter Pickles


My first and largest tomato out of our garden this year.
Jonathan picked the tomatoes, I canned them.
Jason helping with
Baby's Room Demo.
Goodbye Red Carpet,
Hello Cork Flooring!


Summer’s End Stew

1 onion, diced
1 bell pepper, diced
1 jalapeno, diced
2 Tablespoons
    Safflower Oil
1 lb. ground beef
8 cups water
3 large tomatoes,
   skinned & diced
1 cup uncooked
   brown rice
1 1/4 cup corn
2 teaspoons cumin
1/4 cup fresh cilantro,
    chopped
1 Tablespoon salt
Grated Cheddar Cheese for garnish

Directions
As with any soup, take your time.  I like to cook my soups a few hours ahead of time so the flavors have time to "network" with one another.  This stew keeps well in the freezer. 

Heat oil over low/med heat and add diced onions and peppers.  Slowly simmer until tender but not brown 20-30 minutes.  (Yes, this is a long time, but the longer you simmer the more flavor you'll have).  Add ground beef and brown. 
Next add water, tomatoes, rice, corn, cumin, cilantro and salt.  Bring to a boil then cover and reduce heat to low.  Cook until rice is tender, about 45 minutes.  (Brown rice does take awhile).  Leave the lid on and let the stew simmer until serving time.  Top with fresh grated cheddar cheese.  Enjoy! 

Friday, January 27, 2012

When Life Gives You Lemons...

The weather is less than fabulous this time of year in Pennsylvania.  I try to focus on the warm days that await us in just a few months.  Today we prepared for the heat by making lots of lemonade concentrate to store away in the freezer.  January is a great month for all things citrus; I’ll also put away some grated lemon, lime and orange peel to add some pizzazz to future recipes. 
Jason got a little bored with the process. 
Yes, it would be easier to just buy drinks by the gallon this summer, but have you noticed how much sugar is added to them?  Our lemonade is different – NO SUGAR, instead we use Agave Nectar.  It does taste a little different but there is no compromise on the sweetness or refreshment on a sweltering day.  Agave is available in most health food stores; substitute 2/3 cup agave nectar per 1 cup sugar in your favorite recipe.  That’s what I did with my prized lemonade recipe.  Here it is for your enjoyment:
Yes, Jason washed his hands again before helping.
(I freeze the concentrate and add the 6 cups of cold water & ice when I’m ready to serve it.)
1 Cup Agave Nectar
1 Tablespoon grated lemon rind
½ Cup water
1 ½ Cups freshly squeezed lemon juice    
6 Cups cold water
Ice Cubes
Before juicing the lemons I’ll let them soak in a bath of warm water.  This makes them really easy to work with.  Combine agave, rind and water; whisk until agave dissolves then add lemon juice. 


Granny & I in 1982.
Now you may be wondering why in the world I’m trying to cut back on the sugar when I could stand to gain a few pounds.  Over the years few people can resist asking me why I’m so thin.  Believe me; I’ve had nothing to do with it.  No amount of eating or lack of exercise has ever added an inch to me.  I’ve always known that my body type comes directly from my Granny Ada.  My dear Great Grandmother from North Carolina was a tall, bony woman much like myself.  My Uncle once told me that getting a hug from me was like getting one from Granny. 
Granny Ada holding me, her first great grandchild, in 1981.

A few months ago, with the help of my doctor, I came to realize that not only did I inherit my Granny’s frame but I’m also at risk for her health problems – Sugar Diabetes (better known as Type 2).  Yes, much to my amazement those who are underweight are also at risk for the disease.  I don’t claim to understand it all, but my body does not break down food properly, so that is why I’m so small and I stay that way. 

Life has handed me this lemon but I choose to make the best of it.  My Granny lived a healthy 89 years and I’m determined to do the same.  Sugar is loaded in so many of our pre-packaged foods and drinks!  Whether you’re “at risk” or not, take the road less traveled and try making some of your foods from scratch.  Is it time consuming?  YES!  But it is all worth it.